How to deploy an azure web app and then manage that azure web app by deploying code
To use this guide you're going to need
An Azure subscription
A Microsoft account
A GitHub account
How to deploy
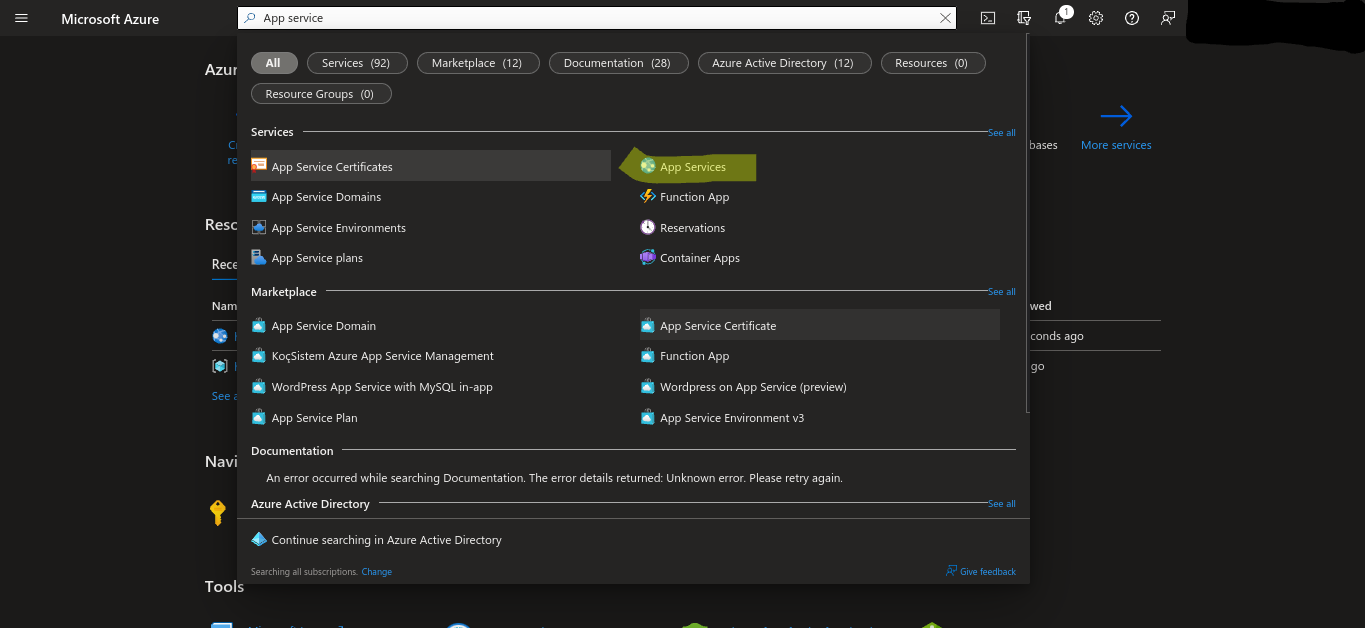
Open the azure portal or click here then go to the search bar and type App service you should see a service called web apps click it look at the image below for reference.
Azure portal
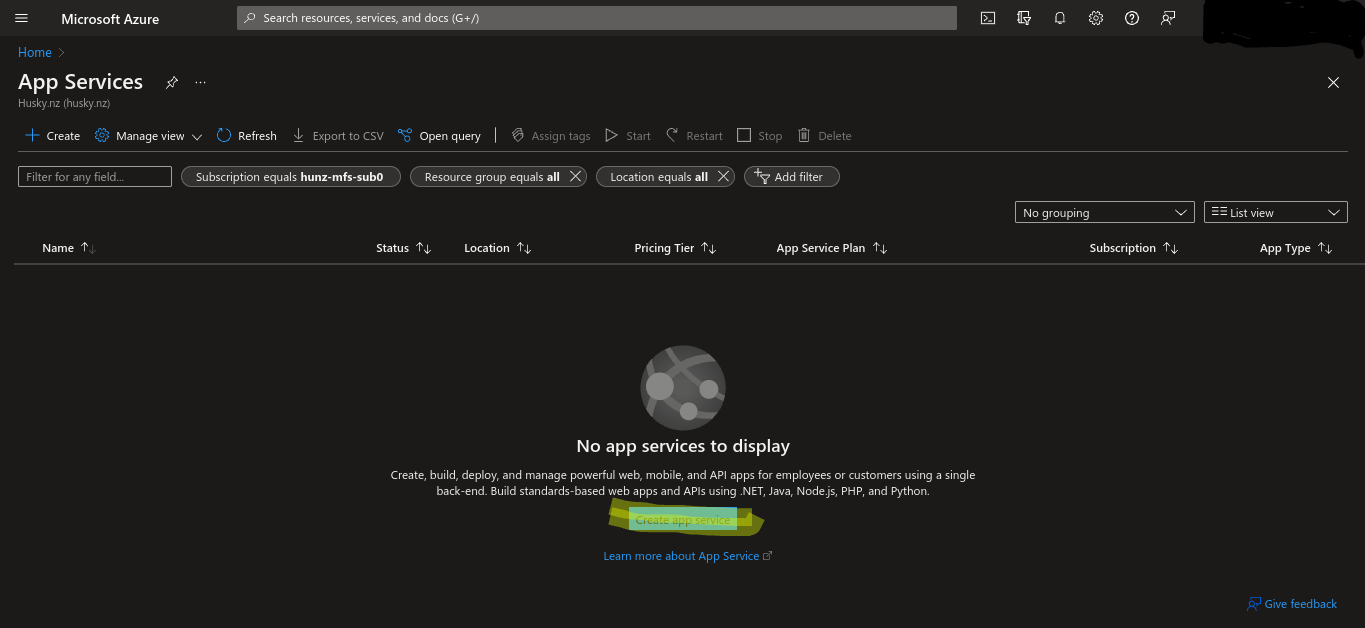
Once you click it you should get to a page looking like what is below, click Create app service to proceed
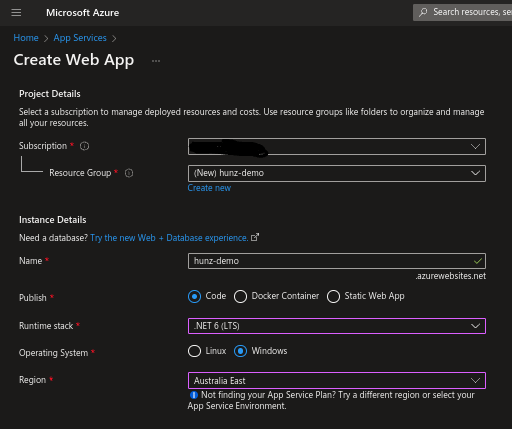
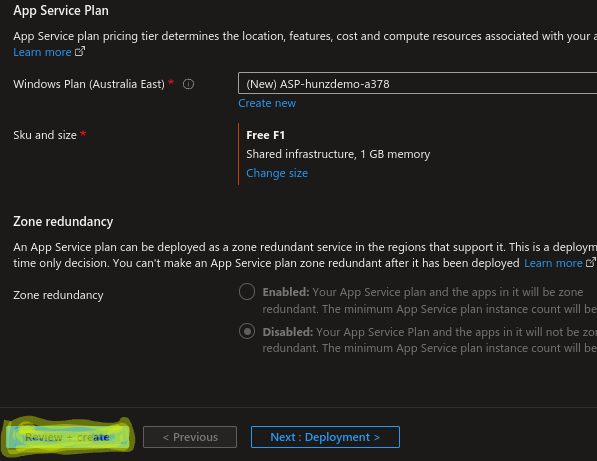
It's pretty simple from here just follow the prompts it wants you to fill in you can follow the example config that I'm doing this will get you up to the sku this is part of the next step that I'm going to explain. Choose your own app name this is also your public subdomain as well as your resource group.
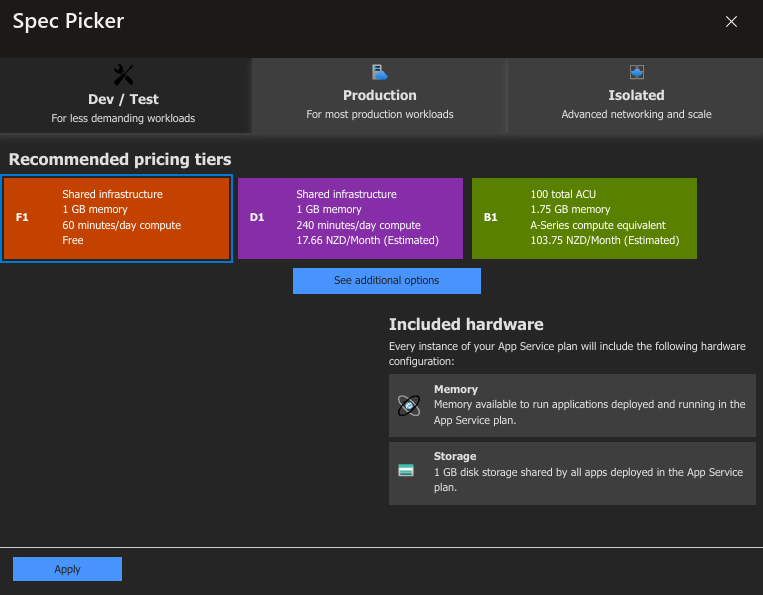
Now onto the sku, there are 3 “tiers” these being dev/test, production, and isolated each has there purpose depending on what you're doing then inside there are sub tires in our case we care about dev/test which has 3 subs “tiers” F1, D1, and B1 the F1 free tier is good for this guide but if you're wanting to use a custom domain and SSL you're going to need to use the b1 tire but as in the photo below I'm going to be using the F1 tier
After you click apply you will be back at the screen below you can click the Review and Deploy button as in the photo below
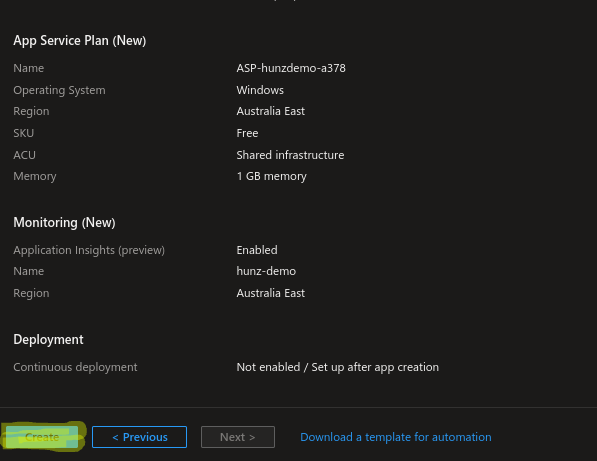
After clicking that you should review the options you picked and click create
It may take a few to deploy, After its finished, it should look like something below you should click go to resource
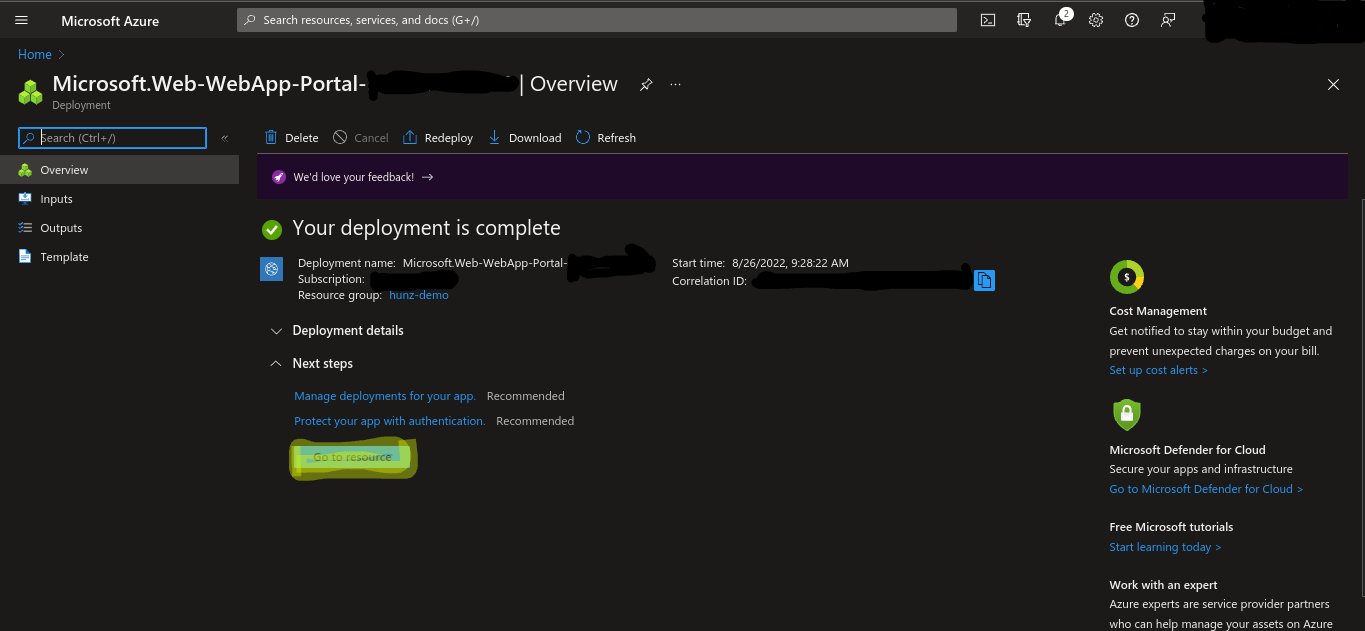
When you click the go-to resource button you should be taken to the app's dashboard. You should see some basic details of your app such as your Resource group, Location, and App Service Plan.

Now onto deploying code. This is where you will need your GitHub account go to the HuskyNZ web app template repo linked below and you need to click the Use this template button. It should auto-select your user account and you will need to give your repo a name choose if you want it to public or private then click Create
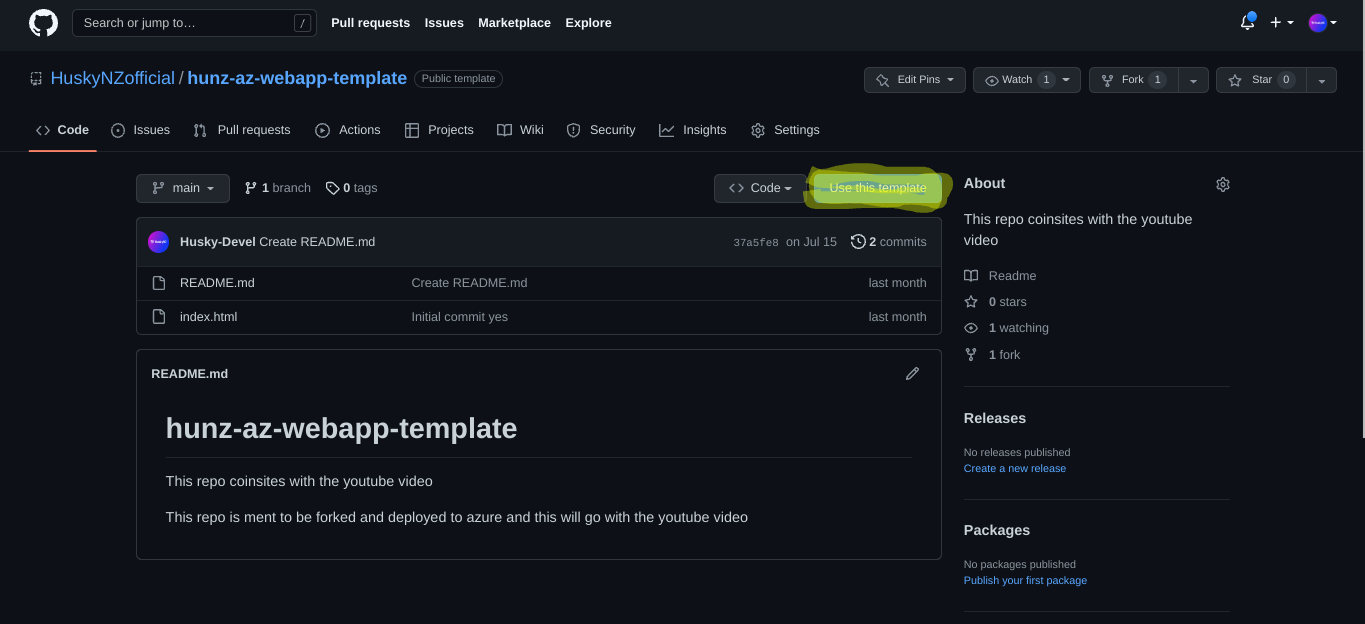
The GitHub repo is here
Once you have made a copy of the repo you can move on to the code deployment.
Back to azure now you should still be on your app's dashboard you need to click on Deployment Center on the left navigation bar, It should look like below unless they update the UI
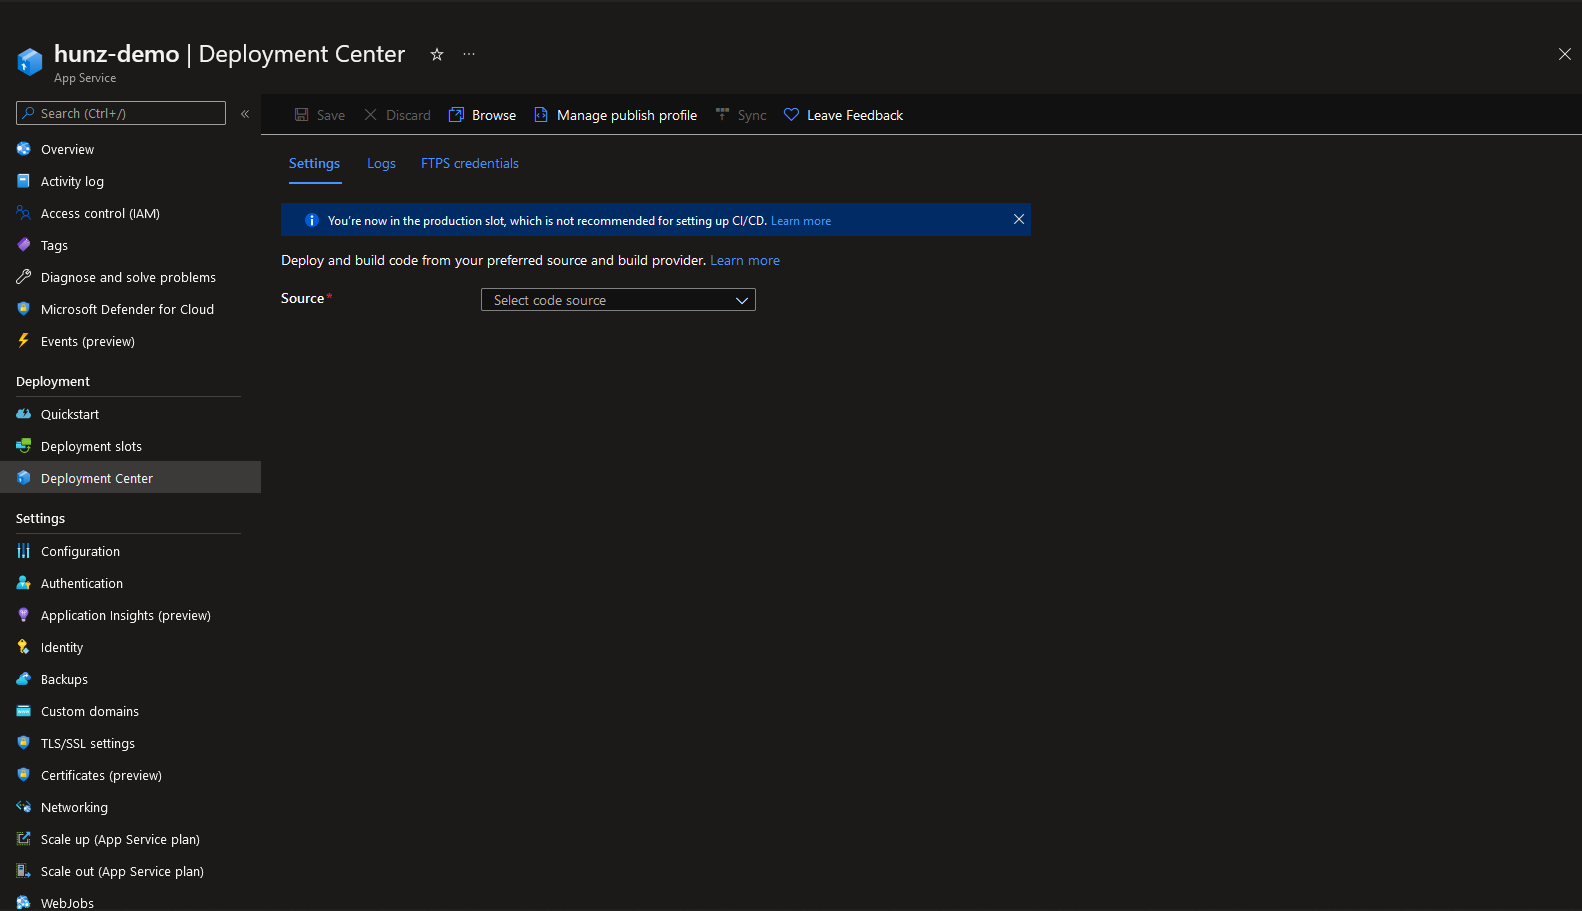
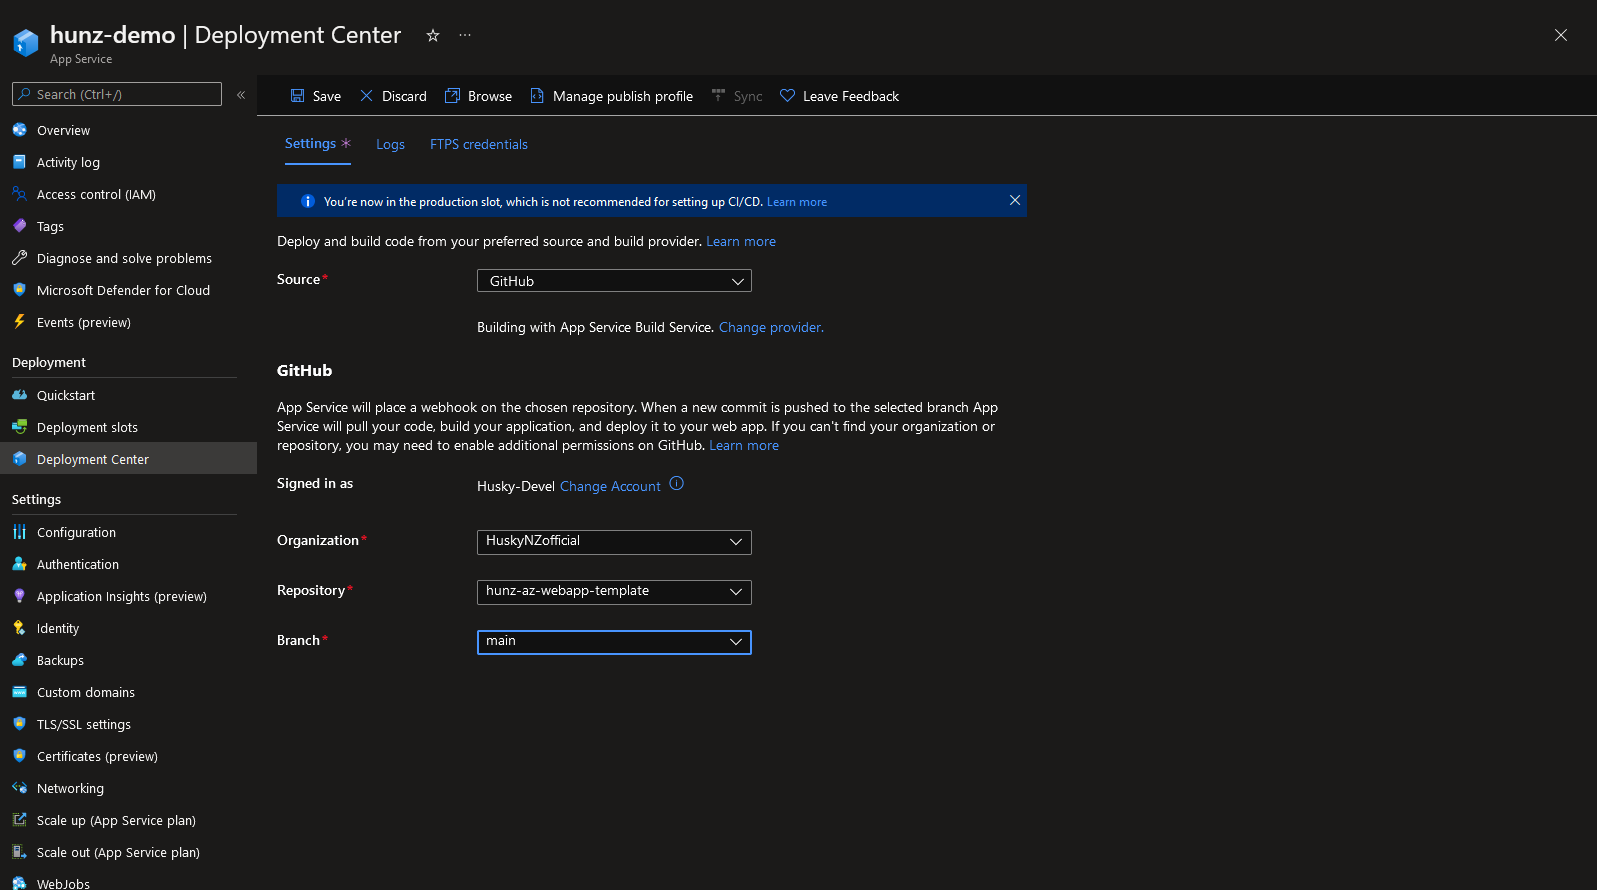
Next click on the Select code source dropdown, you will see many different options in this dropdown the one we're interested in is GitHub, After selecting that you need to click Change provider, and choose App Service Build Service as Github actions will not work for this deployment, Then select your account, repo, and branch. Then click save
After clicking save your app service will go and pull from the GitHub repo to view the progress click on the logs tab at the top of the page

Now you can go to the public URL for your web app and should see a basic webpage which we will change in the future
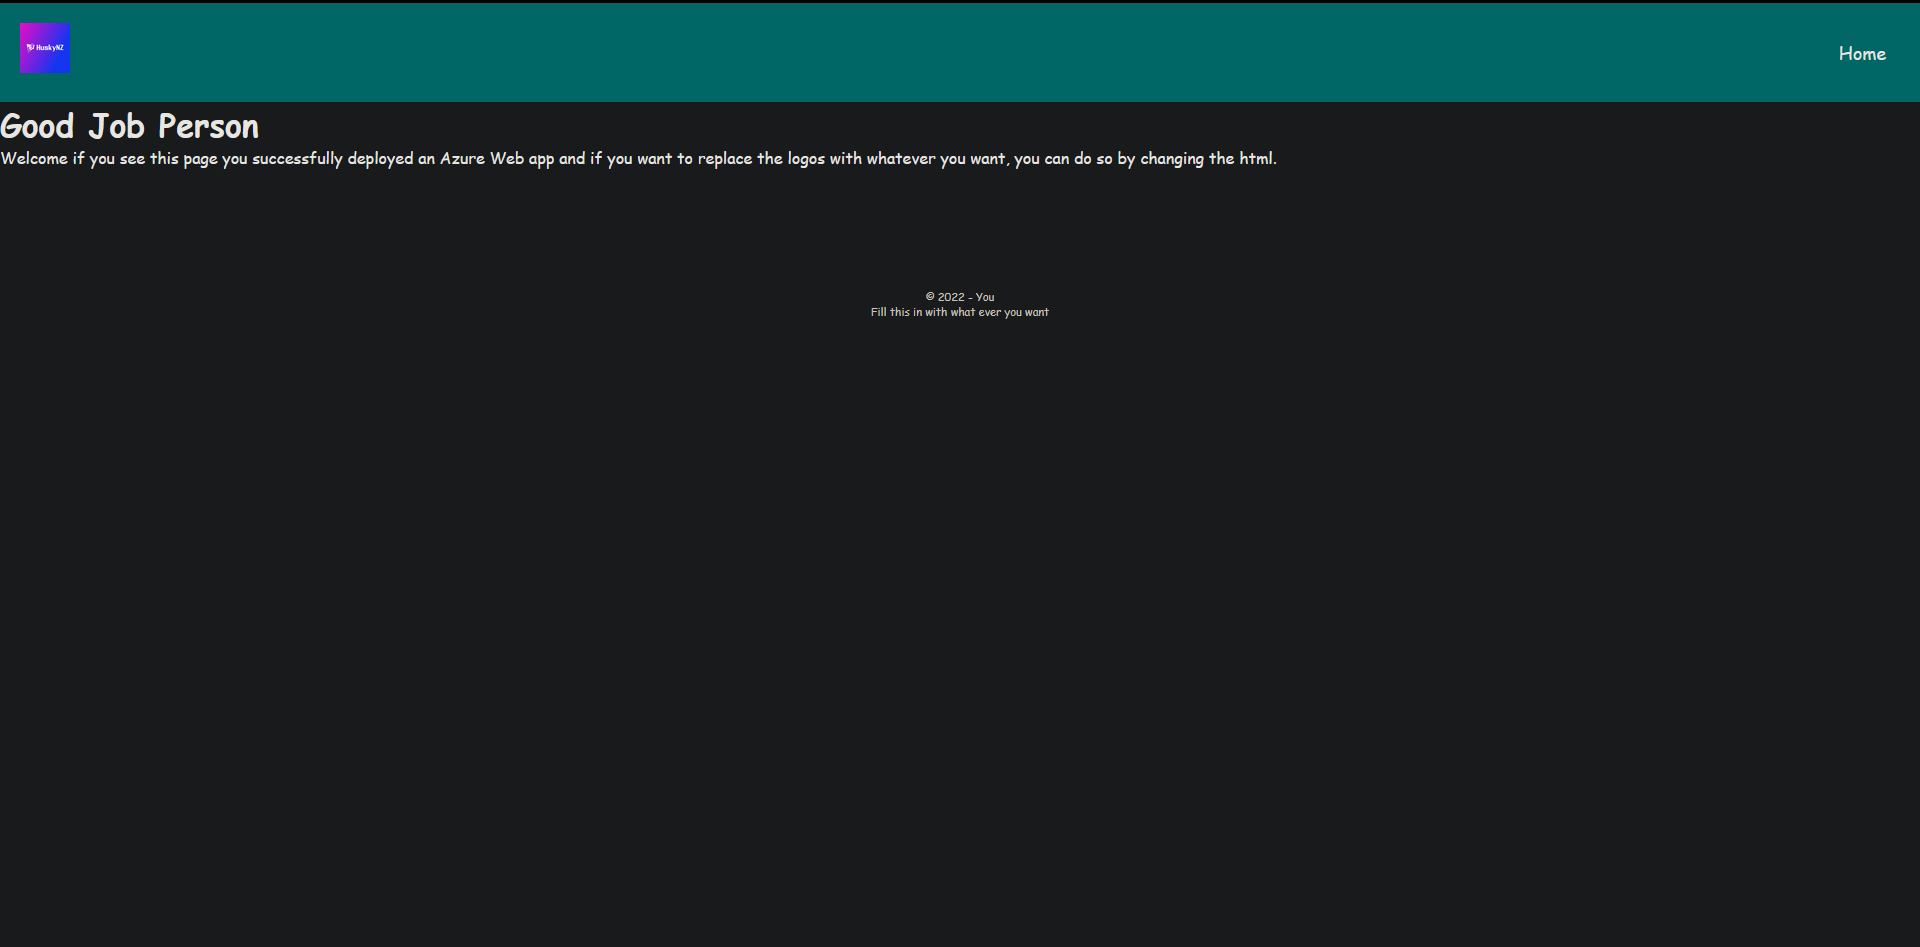
Good job your done and hopefully learned something.
(This took 4 weeks to write)